Make this trifold insert for your planner (or Journal, Scrapbook, Album, etc.), in holiday or non-holiday themes:
From these three items:
~~~~~~~~~~~~~~~~~~~~~~~~~~~~~~~~~~~~~~~~~~
I have used a planner a long time…years in fact. But I discovered I was not using it as much as I should. It was boring. But when I saw people were turning these things into something more personal, and decorated, and best of all…using stationery products, I became re-hooked! I had watched many a video for various planner diy things. Like many people, I watched videos about setups, and styles of planners, and supplies, and the list goes on. The fever caught on more and more. There are many things I cannot afford to outright buy for my planner, so I set out to try to make the things I liked or found most useful.
I had seen quite a few videos and blogs where people were making special inserts for their planners, such as pockets, and dividers, and page markers, and even fold out accessories. I saw so many things I loved. But my one dilemma was I liked so many of them, but knew a planner wouldn’t fit them all. So my task was to find a way to incorporate the best parts of them all. I knew I wanted something to fold out, first of all. I knew I wanted it to have one or more pockets. I knew I wanted it to be able to feature a photo/photos I loved. I wanted it to be able to perhaps hold a notepad, or to do lists, or even a business card, or something that size. I also wanted it to be able to hold sticky notes and also be custom to my likes, and have color and theme. Then of course throw in, I wanted to do it on a budget…hence dollar store materials. Quite a request list to fill, but I enjoyed the challenge.
I did this whole project while I was away from home, not with the best lighting, and under difficult conditions, so please be patient with me, my DIY’s will get better. =) I also filmed the making, but I am not quite ready yet to start sharing videos (I am a tad shy.) I am awaiting feedback to see how I am doing, before I start expanding. But if there is enough interest, I may eventually share it, or others.
I may eventually make another one of these in a different theme, but for this one, it is Christmas themed. It uses only dollar store items or equivalents, such as Target dollar spot and the like. For now, lets just call it the planner fold out multi-tasker. I have many people to thank for inspiring me with their various ideas. I have even incorporated a lot of what they made into my own rendition. At the end of this DIY, I will list all of their links so that you may also see their projects too.
~~~~~~~~~~~~~~~~~~~~~~~~~~~~~~~~~~~~~~~~~~
Without further ado, here is the DIY supply list, instructions, and more images…
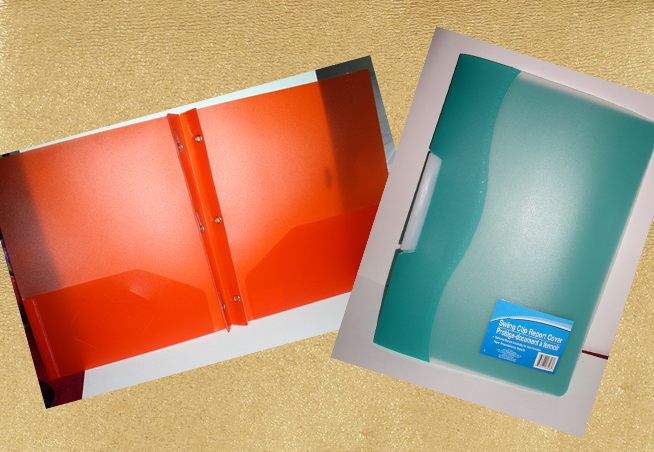
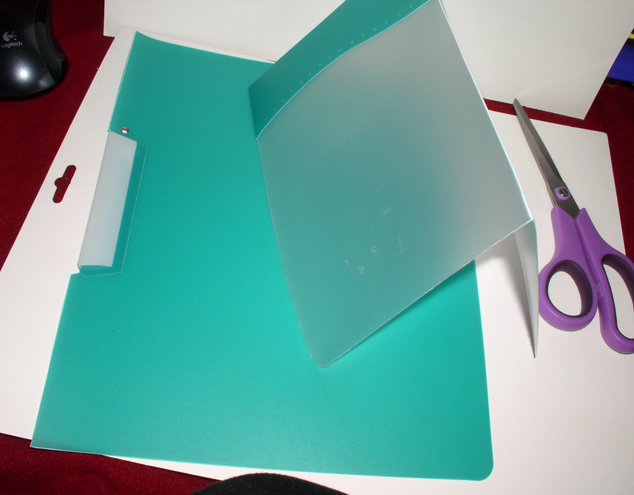
1) Two folders with coordinating colors (such as for a holiday theme or however you like it), and preferably each having something unique to add such as a pocket you like, business card slots, etc. I like to find interesting ones to add versatility to it’s functions. Also, it was important to me, to have at least one have a clear portion to see through, and the other to be at least somewhat see through. The first one has a clear cover with green trimming, and the second is all red, but it is a see through red.
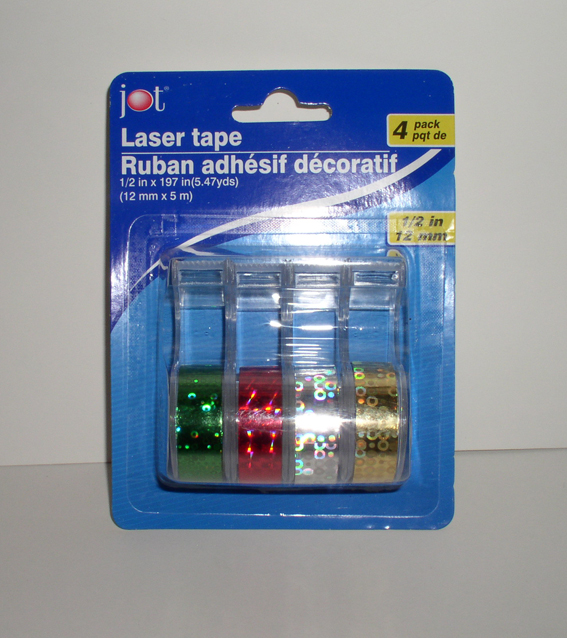
2) Colorful, yet well adhering tape. What design you choose is really a matter of personal taste. For this I went with the metallic looking tapes Dollar Tree has. The tape is pretty key, as the folders won’t turn right if you don’t bind the edges with it. If you find a tape you like, but it does not adhere the way it should, I recommend reinforcing with some glue.
3) Very good quality scissors as you will have to cut through some thick plastic. Guillotine type cutters would probably work well too, but this project would probably prove hard to do, in the regular sliding cutters like Fiskars makes. I have not tried that, but if it works for you, that’s fine too.
4)Stickers and other things you would like to embellish with. I recommend using more flat items, as thicker or raised items might add more bulk to your planner or journal, etc.
5) Optional (as needed) – Adhesive or glue of some type. I would avoid hot glue as it might add too much thickness, or anything too wet or overly tacky, it might tear stickers, tape, or embellishments.
That’s it! Depending on how much embellishment you add, and what you already own, you can spend anywhere from 3 to 5 dollars on the basic supplies. It is also fun to get creative and work with what various dollar spots and bargain places have in stock. Challenge yourself to take what they have and make something of it!
~~~~~~~~~~~~~~~~~~~~~~~~~~~~~~~~~~~~~~~~~~
Steps:
(Note here: this project was done for a 5 1/2 by 8 1/2 planner, which is fairly close to the A5 size. If you wish to do it for a different size, you will of course have to measure and plan accordingly.)
1) For the first folder, the green one, I cut the front and back apart on the seam. Then I took the front side, the one with the clear portion and the green trim, and folded it in half. This part can be tough, depending on how thick the material is, it might take you a little time and effort. Things like the smooth end of the scissor handles can help, or bone folders, or anything to help you run over the crease and get it to fold well. Try folding it both directions, to get it to crease better. Also, putting weight on it for a couple days can help too. It eventually will give way, so don’t worry if it seems hard to fold at first. This folder, as you can see from it’s sticker, came straight from Dollar Tree. They often have so many types to choose from. The best times of year to find more choices, are summer, and just before and during back to school time. I would then measure out and punch your holes in the first folder, before taping them together. It is just easier that way. Be careful what punch you use. Thicker plastic can break some hole punches. Unless you know your pricier multi-punch tool can handle it, I recommend using a cheaper single punch, in case it breaks, it is easier to replace. I think office supply stores will also hole punch things, though I am not positive, nor know if it costs anything.
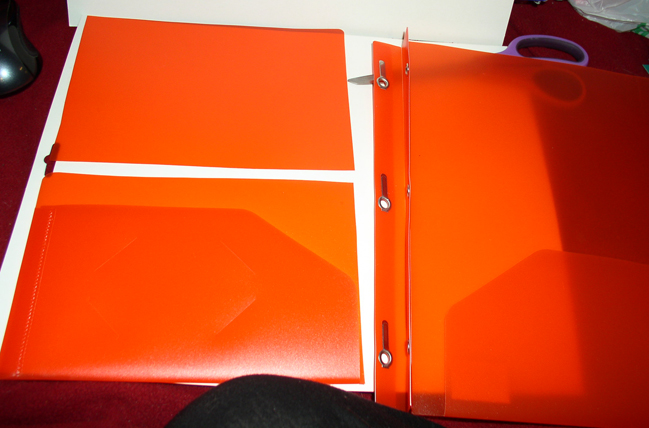
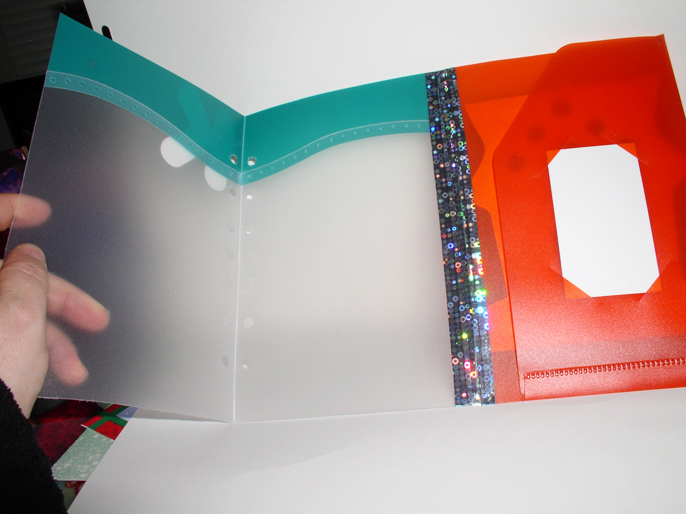
2) For the second folder, the red one, do the same and cut the front and back apart on the seam. I bought this particular folder at a Supermarket called Safeway, for 99 cents. Many stores carry ones like this. I loved how Christmassy red it was, yet was still see through. I also loved how it had pockets that would be open on one side, so that when I turned the cover, it would have an open top. In addition, it has the business card holder slits on both pockets, adding an extra place to insert things. After I cut the covers apart, I then measured and cut the one cover in half again, so as to get it the right size to tape to the other portion. **IMPORTANT: Make sure when you measure this portion, you plan on the inner foldout being slightly narrower so that when you fold/close it, it does not interfere with the punched holes on the other side, or being able to close the binder mechanism. Ideally, if you measure right, you should not need to punch this side. Then of course you just turn it so the pocket is on the side, and can be side or top loaded with items.
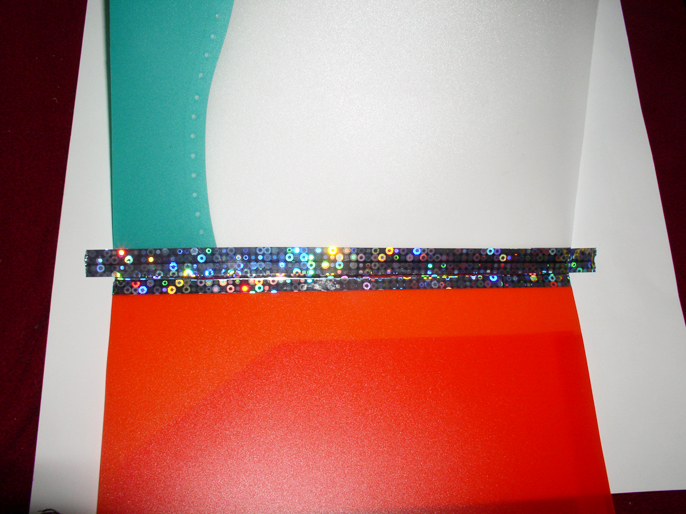
3) You take your decorative tape, or just merely functional tape, and carefully place it down the side of the first folder, and line it up so that you can then take the second folder and carefully lay it down on the tape. Ideally you want the tape to half and half cover each side. Think of it as your binding. This might take some time and effort, depending on the kind of tape you use. Take your time and get it right, so it will hold up. If you find the tape is not staying down, I recommend using a glue to add reinforcement. I have not tried it yet, but perhaps a tacky glue. I don’t recommend hot glue as it will likely add bulk and perhaps mess up or melt your tape and/or plastic.
Make sure to make the tape binding thick enough to cover both sides and leave a slight space in between so that it will fold.
4) This is where I then cutout the cover of the sticker book and glued it down to the inside cover, and then glued the initial to the front, but of course add embellishments as you like them. I used a crazy glue type adhesive, but I am sure others would work. I would think spray adhesive should work, I like the 3M one, and perhaps even tacky glue. Then just add the rest of your embellishments. Stickers and post-its and clips oh my! Have fun with it and really make it appeal to what you would like to see each day, or just for the holidays.
~~~~~~~~~~~~~~~~~~~~~~~~~~~~~~~~~~~~~~~~~~
Other Notes About My Decorating:
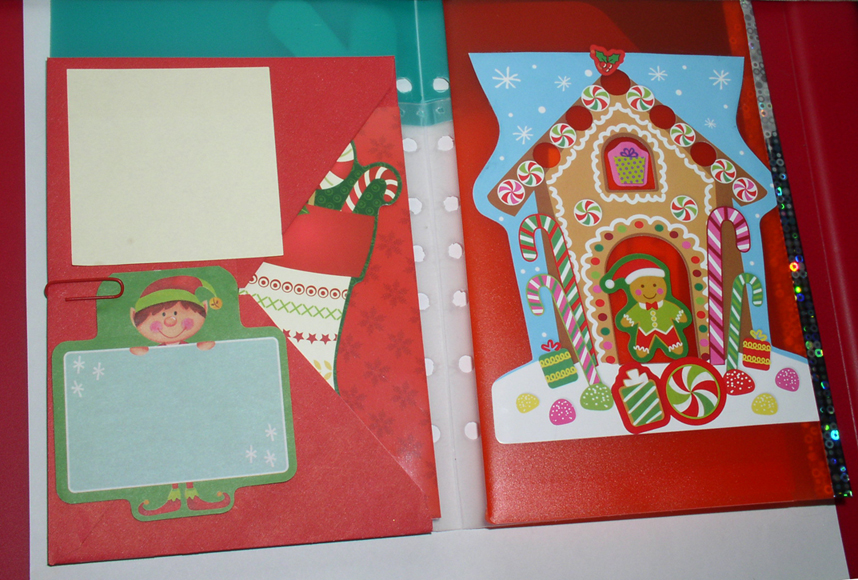
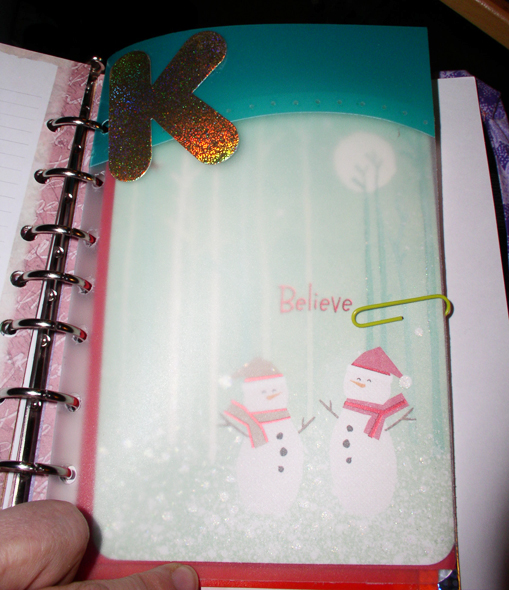
In addition to the above items, I chose a couple stationery items to either accent the fold out, or to put inside. I used a package of poster letters from Dollar Tree, and just glued the gold K to the front cover to give it more personalization. I then paper-clipped a beautiful Christmas/snowman-themed card to the inside of the front cover, to inspire me each time I looked at it. The inside of the card has some beautiful verses about believing and the spirit of the season. I can flip open the foldout, and then flip open the card anytime my spirits need to be lifted.
When I open the front cover, I have also clipped a red envelope to the inside to hold anything I like, such as a holiday card for journaling, or anything else I like, and a couple of post it pads for jotting quick notes. I just folded the flap of the envelope under to make it more like a pocket. You can also choose to adhere what you like to the outside or inside of the cover. I used the clip, so I can change things out when I like.
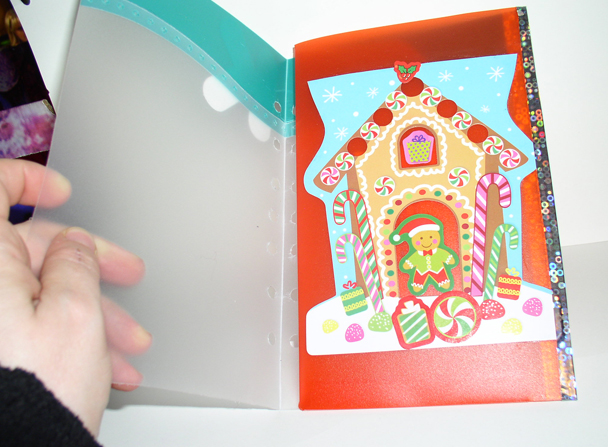
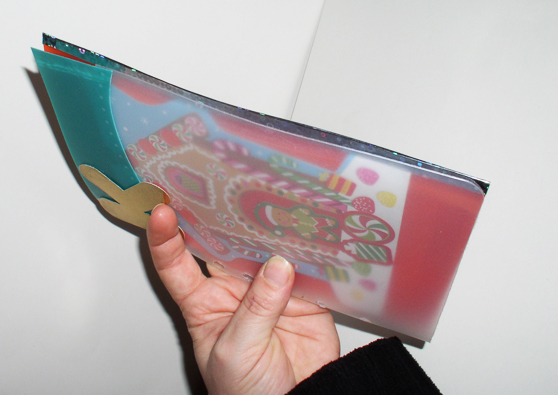
On the outside of the inner foldout, I cut off the cover of a Dollar Tree sticker book, and glued it down as I really loved the look of the gingerbread house. This thing was only meant to be the cover of the sticker book, but I thought it looked so cute as part of the embellishment. I loved how it had cut-outs to put things in the door and window. I merely covered the words at the bottom with extra stickers. Then I used the gingerbread man and present stickers to stick in the door and window. Doesn’t it make a nice addition to this foldout?
For the inside of the inner foldout, I just placed a blank journal card in the business card slot. But some ideas for things to put in there could be of course a business card, perhaps one to remind you of something you wish to buy, or an appointment card for a doctor, or an image of a loved one, or a index card, cut down to size, to write your thoughts. You could even insert a piece of mail to remind yourself to get sent out, just stick it in one or two corners only, since it won’t fit in all of them. I also placed a couple small sticky notes, and then another card to the inside of the pocket…perhaps for journaling, or anything you can think of. The middle flap, I am thinking I will eventually adhere down a notepad for quick note jotting.
~~~~~~~~~~~~~~~~~~~~~~~~~~~~~~~~~~~~~~~~~~
That’s all there is to it!
Simply summed up, cutting two folders, folding and taping together, and then decorating. I went into detail in case there is anything specific anyone wanted to know. Definitely customize it to what you like.
I might even make one of these for the spring, with some pastel folders, pretty floral tape for binding, and some butterfly, flowers, and of course, cat stickers to embellish. I will be putting the above one right into my planner, likely at the very front.
I hope you liked this project, and enjoy making it as I did.
There will be many more DIY’s, and I hope at least one more holiday one, before Christmas. I hope for them to be more timely than this one, but settling in has taken quite some time.
Have fun with your DIY, and hope you get to enjoy it on a budget too!
Let me know what you think below. If you make this yourself, I would love to see images and what you did!
Thanks for reading, and wishing you lots of fun and warmth this holiday season,
Kat :@
P.S. – A few more pictures for you:
Also, these are the links for the very talented people who inspired this creation. Thanks to them for their creativity, and please check them out too, as they came up with neat stuff:
http://www.mylifeallinoneplace.com/2012/01/filofax-swing-pad-you-can-make-at-home.html – DIY Filofax
Swing Pad
http://lifeinprintphotography.blogspot.com/2014/06/foldout-planner-dashboard-video.html – DIY Foldout
Planner Dashboard
https://www.youtube.com/watch?v=NrluiPnNj_w – Foldout workboard
http://www.wondereland.com/diyfish/tutorial-no-12-a-folding-kanban-productive-system/ – DIY Folding
Kanban for Planner/Filofax
https://www.youtube.com/watch?v=ZOsR6_H9lmA – DIY Foldout Photo Pocket for Planner
http://www.diyfishblogs.com/diyfish/tutorial-no-13-to-do-board-for-filofax/ – DIY To-Do Board for
Planner/Filofax
~~~~~~~~~~~~~~~~~~~~~~~~~~~~~~~~~~~~~~~~~~
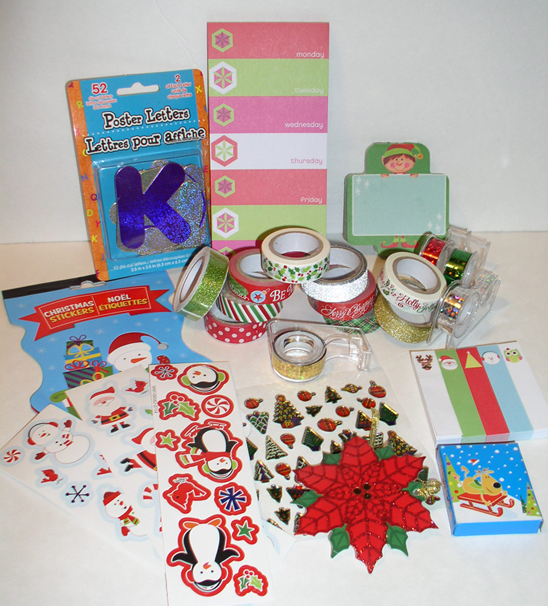
P.P.S… A little extra goodie for you washi tape nuts (like me)…an image of all my holiday washi tapes. I love to find images like this to ogle over…so ogle away! Most of these I found at either Dollar Tree or Target Dollar Spot.


